How to Use 2PACK
Complete step-by-step guide to organizing your storage with QR labels and the free 2PACK app
Welcome to 2PACK! This guide covers everything from signing up and creating your first bin to scanning QR labels, generating inventory reports, and purchasing labels. Use the table of contents on the left to jump to any topic.
1 Getting Started
2PACK works in any modern web browser — no app store download required. Visit 2packstorage.com on your phone or computer to get started.
- Go to 2packstorage.com and tap Sign Up to create a free account, or Sign In if you already have one. You can also sign up with Google for instant access.
- Enter your email address and choose a password. You'll receive a verification email — click the link inside to activate your account.
- Once verified, you'll land on the Home screen showing your bins. First-time users will see an empty state with a prompt to create your first bin.
Tip: 2PACK works offline. Once loaded, you can browse bins, view items, and scan QR codes without an internet connection. Changes sync automatically when you reconnect.
2 Creating Your First Bin
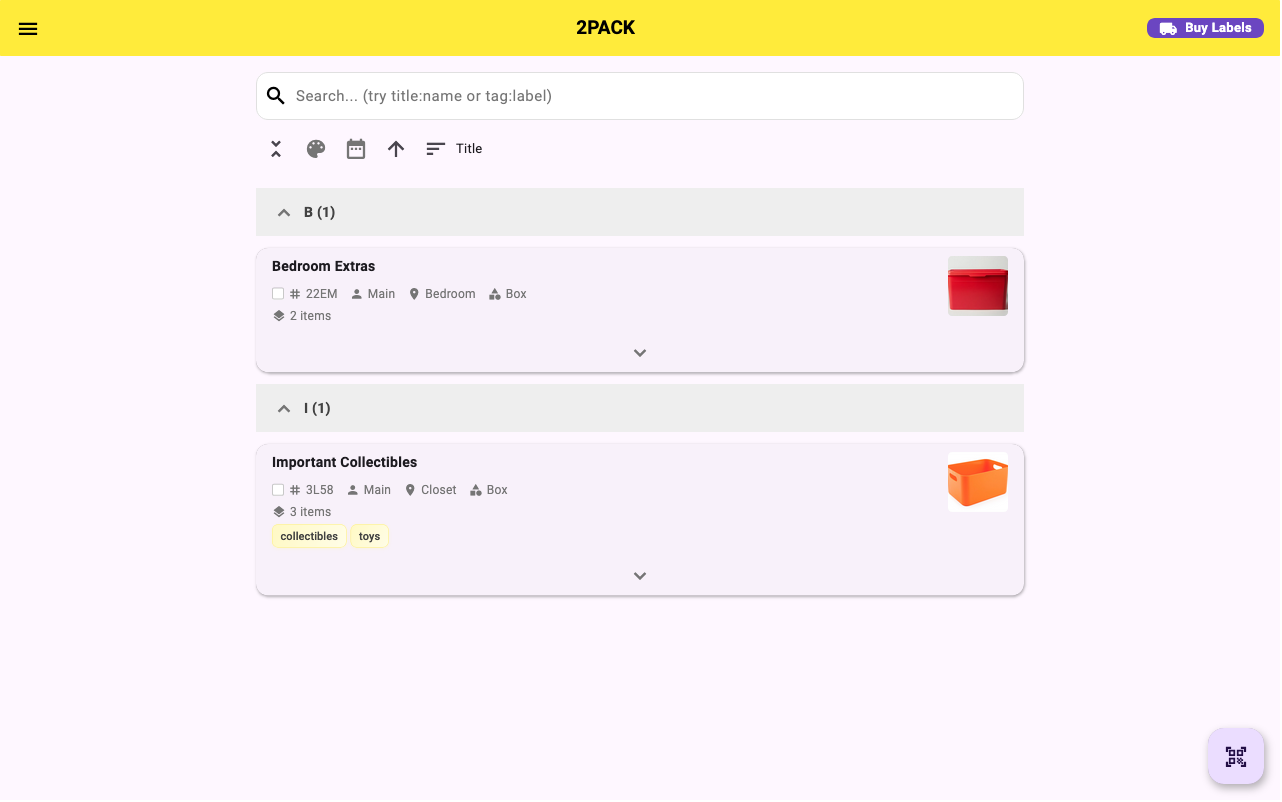
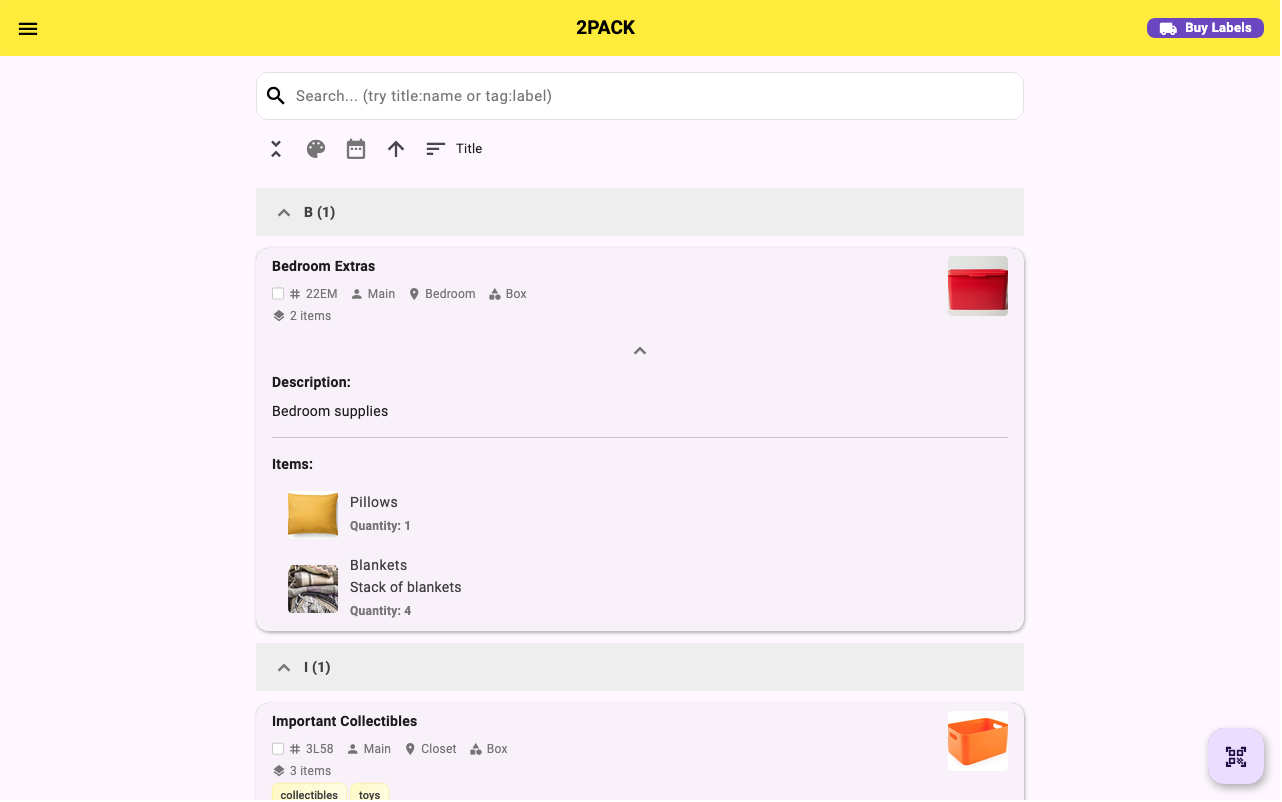
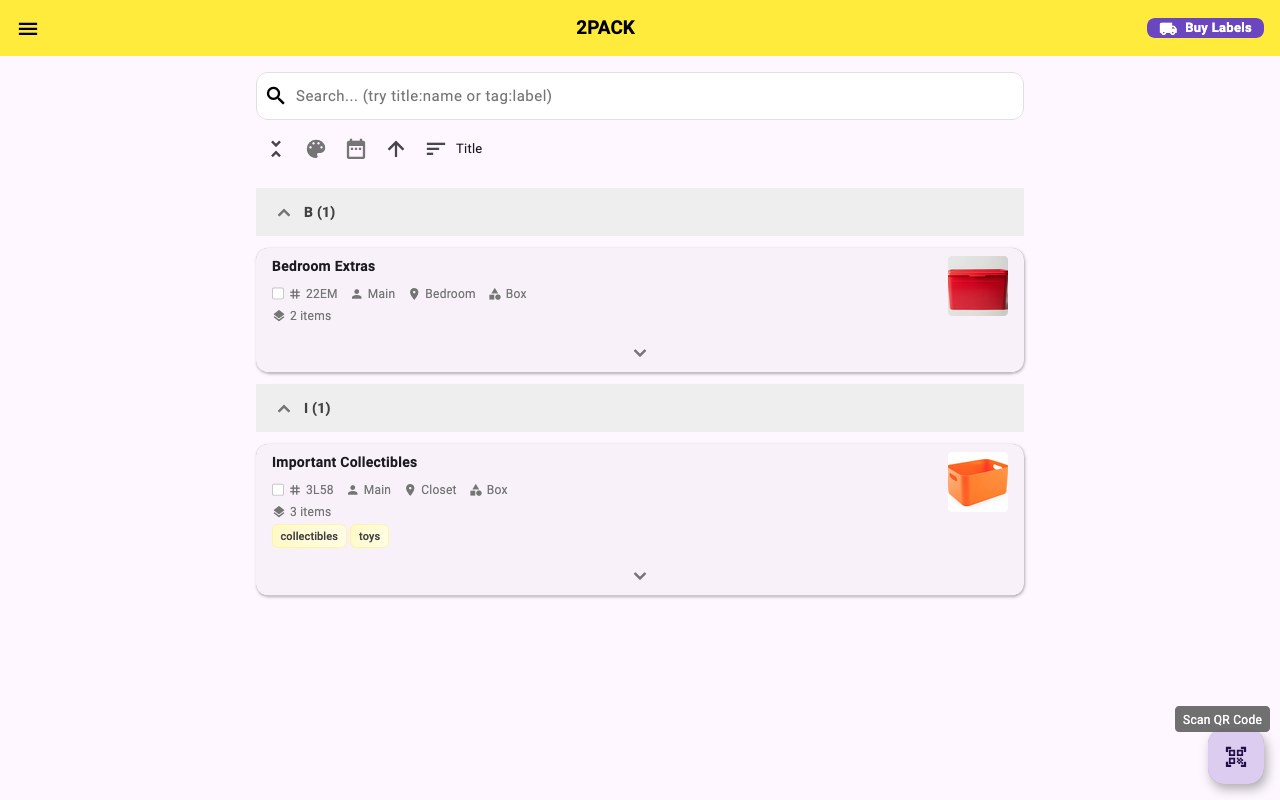
A "bin" in 2PACK represents any physical container — a box, tote, shelf, drawer, or storage unit. Each bin gets its own QR label so you can scan it to see what's inside.
- On the Home screen, tap the + (plus) button in the bottom-right corner to open the Add Bin form.
- Enter a Title (e.g., "Winter Clothes") and optionally a Description for quick reference.
- Add photos by tapping the camera icon — take a new photo or upload from your gallery. Multiple photos are supported.
- Assign a Location (e.g., "Garage", "Basement"), Tags (e.g., "Seasonal", "Clothes"), and a Profile (e.g., "Home") to categorize your bin.
- Choose a Container Type (Box, Tote, Bin, Shelf, Drawer) to help with filtering later.
- Tap Save. Your bin appears on the Home screen and is ready to have items added.

Tip: If you bought 2PACK QR labels, attach one to your bin before creating it in the app. When you tap the QR scan icon during bin creation, it will link that label to this bin automatically.
3 Adding Items to a Bin
Items are the individual things stored inside a bin. Each item can have photos, a quantity, description, UPC barcode, warranty date, and more.
- On the Home screen, tap a bin to expand it and reveal its contents.
- Tap the Add Item button (usually shown as a + or "Add Item" text inside the expanded bin).
- Enter the item Name, Quantity, and optionally a Description.
- Add photos — tap the camera icon to photograph the item directly, or select from your gallery. Add as many photos as you need.
- Optionally tap the Scan Barcode button on the item form to scan a product barcode (UPC/EAN) and auto-fill the item name and details from the product database — no typing needed.
- Add a warranty date, purchase date, or other custom notes if relevant.
- Tap Save. The item now appears in the bin's item list.

Bulk add: Need to add many items at once? Use the Bulk Add feature to enter multiple item names at once — no need to save between each one.
4 Scanning QR Labels
QR scanning is the heart of 2PACK. Stick a label on a bin, scan it with your phone, and the bin opens instantly — no searching required.
- On the Home screen, tap the QR code button in the bottom-right corner of the screen (the floating action button).
- Point your camera at a 2PACK QR label. Hold steady for a moment while it reads the code.
- The app opens the associated bin immediately, showing all items inside.
- Claiming a new label: If you scan a label that hasn't been claimed yet, the app will prompt you to link it to an existing bin or create a new one. Labels are unique and cannot be shared between accounts.
Tip: 2PACK labels also scan from the Amazon listing page for verification. If you receive labels that won't scan, contact [email protected].
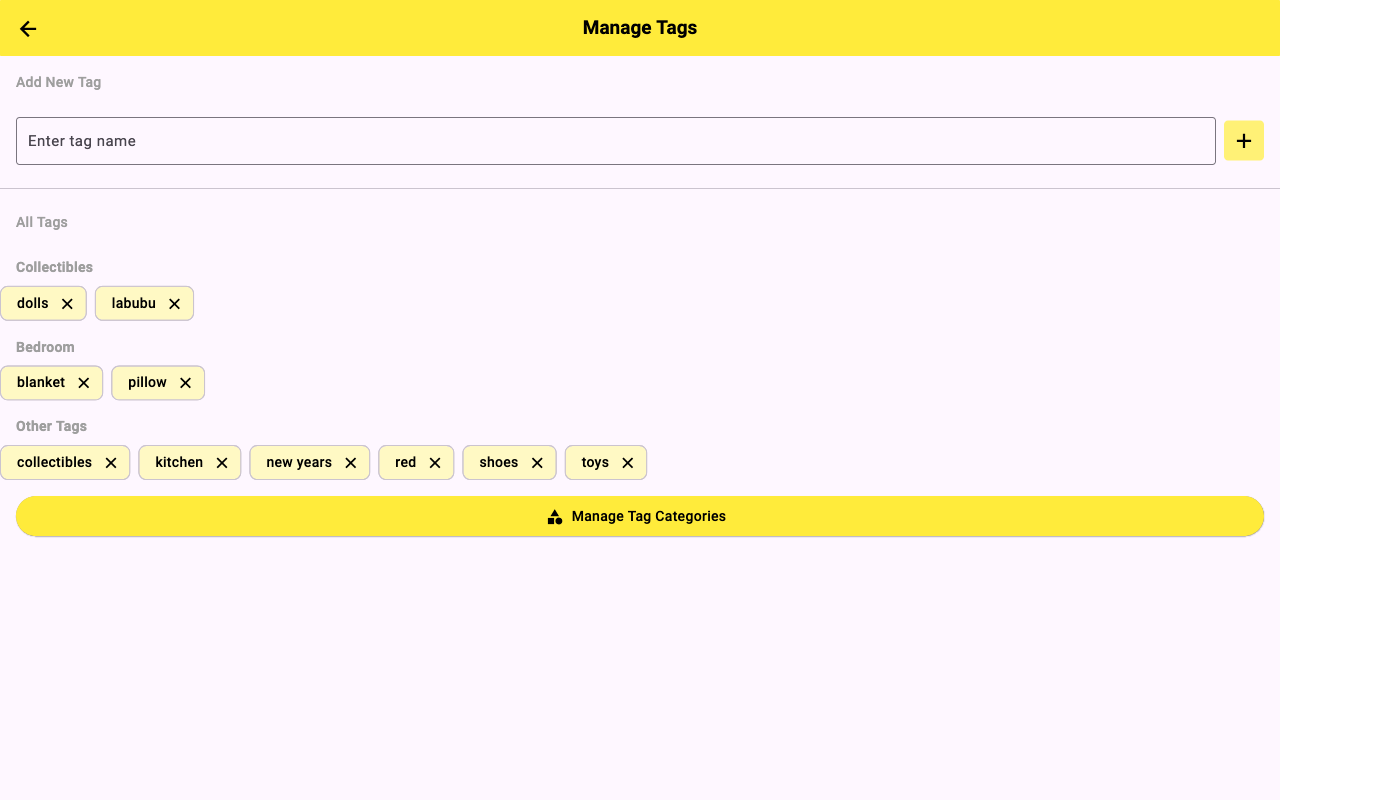
5 Organizing with Tags, Locations & Profiles
2PACK gives you four levels of organization: Tags, Locations, Profiles, and Container Types. Set these up in Settings before creating bins to make filtering and searching more powerful.
Tags
Flexible labels like "Seasonal", "Fragile", "Kids", or "Holiday". One bin can have multiple tags. Great for cross-cutting categories.
Locations
Physical places like "Garage", "Basement", "Office", or "Storage Unit 3". Filter your home screen by location to see only what's in that room.
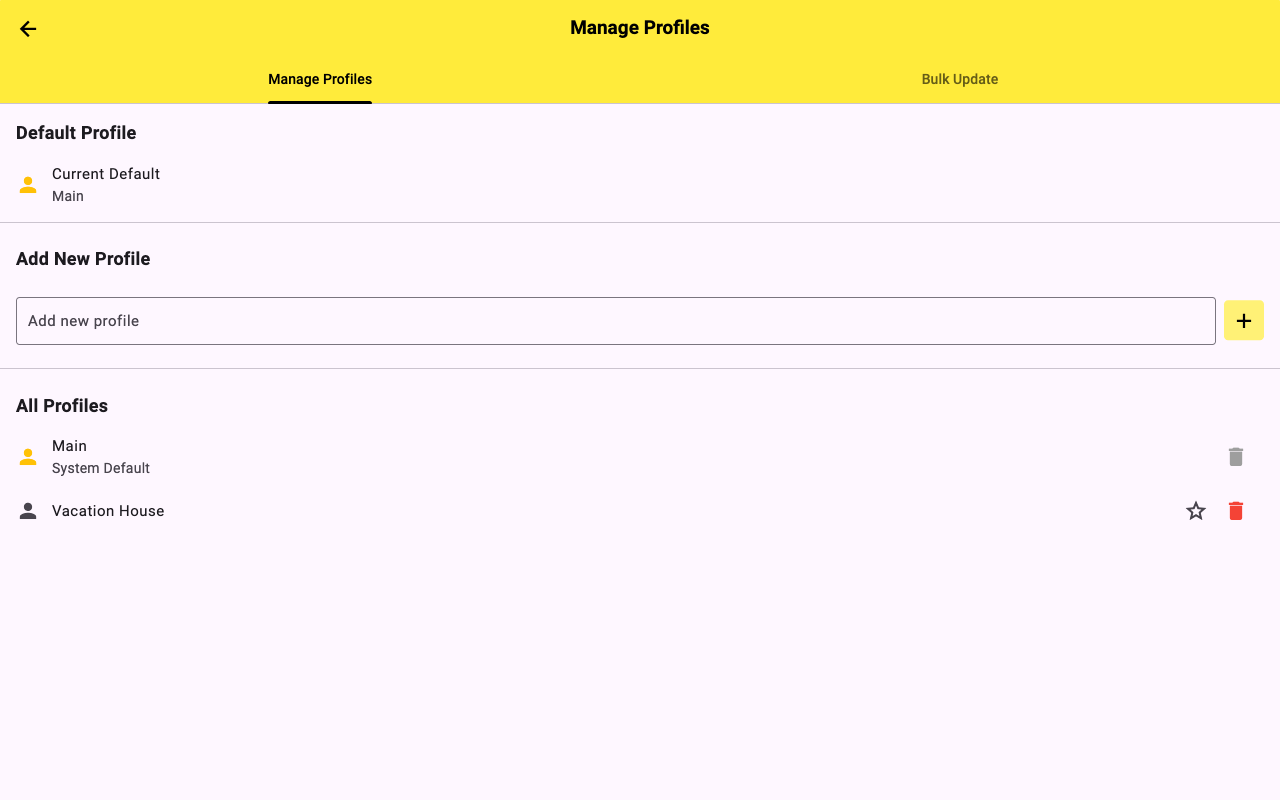
Profiles
High-level groupings like "Home", "Work", "Business Inventory". Useful if you use 2PACK for multiple purposes.
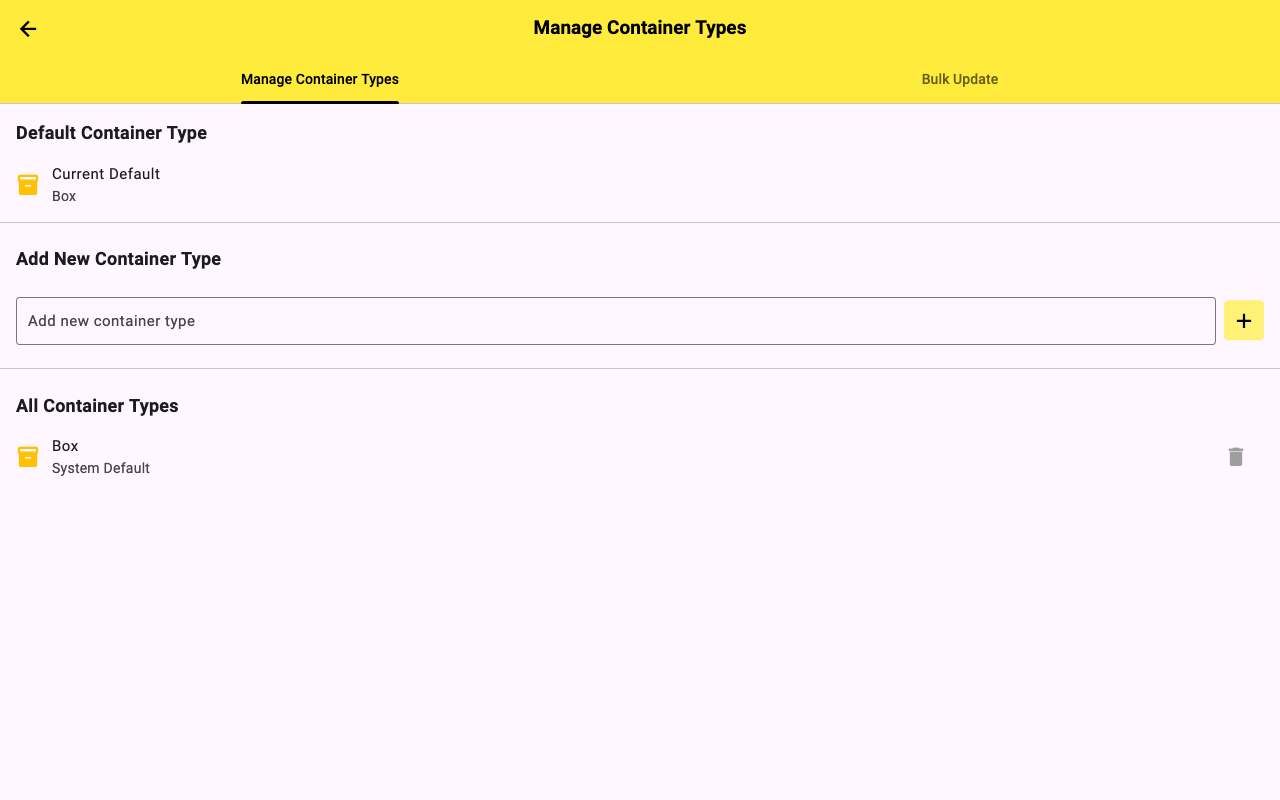
Container Types
Classify bins as Box, Tote, Bin, Shelf, or Drawer. Helps when filtering a specific kind of storage vessel.
Setting up Tags
- Go to Settings → Tags.
- Tap Add Tag and type the tag name.
- Choose a color for easy visual identification.
- Tap Save. Your tag is now available when creating or editing bins.
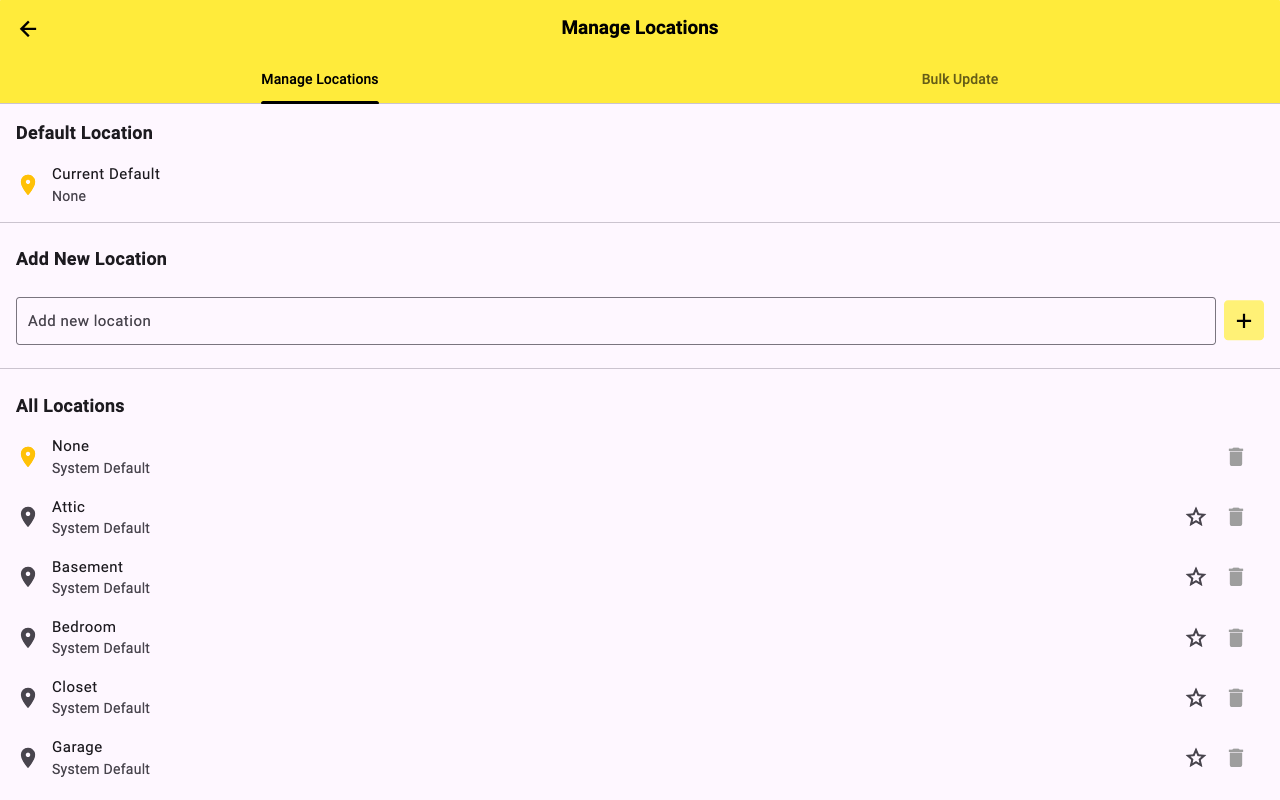
Setting up Locations
- Go to Settings → Locations.
- Tap Add Location and enter the name (e.g., "Garage").
- Optionally add a sub-location or zone within that space.
- Tap Save. You can now assign this location to any bin.
6 Searching & Finding Items
Never dig through boxes again. 2PACK's search and filter tools let you find any item in seconds.
- On the Home screen, tap the search bar at the top and type any keyword — item names, bin titles, tags, or descriptions are all searchable.
- Use the filter icon to narrow results by Tag, Location, Profile, or Container Type. Combine multiple filters at once.
- Results show matching bins and items. Tap any result to jump directly to it.
- Use Locate Bin (Settings → Locate Bin) to find the nearest bin to your current GPS location — useful in large storage units or warehouses.
Tip: Search is instant and works offline. Your entire inventory is indexed locally so there's no network delay.
7 Sharing & Transferring Bins
2PACK supports household sharing and business collaboration through bin sharing and bin transfer features.
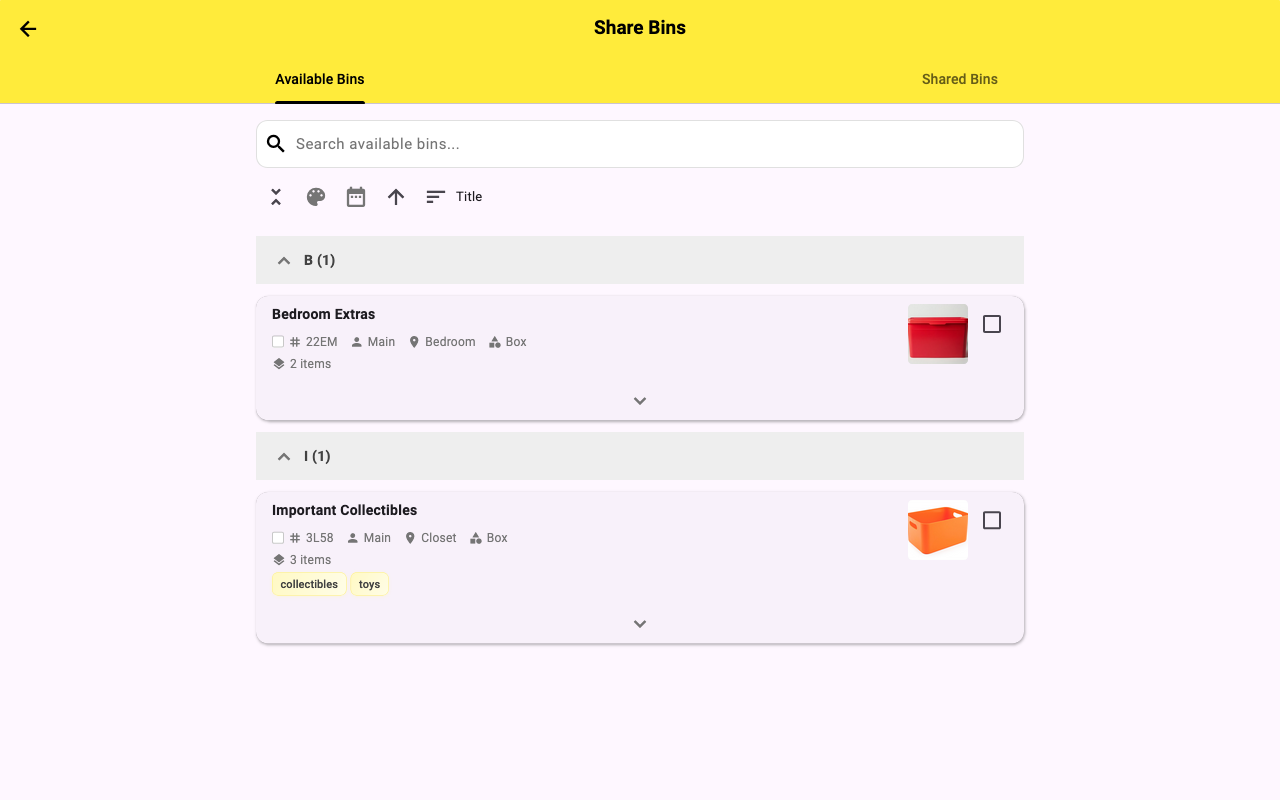
Sharing Bins
- Go to Settings → Share Bins.
- Enter the email address of the person you want to share with. They must have a 2PACK account.
- Choose permission level: Read (can view contents) or Write (can edit, add, and remove items).
- Tap Share. The recipient sees your bins in their account with the appropriate access level.
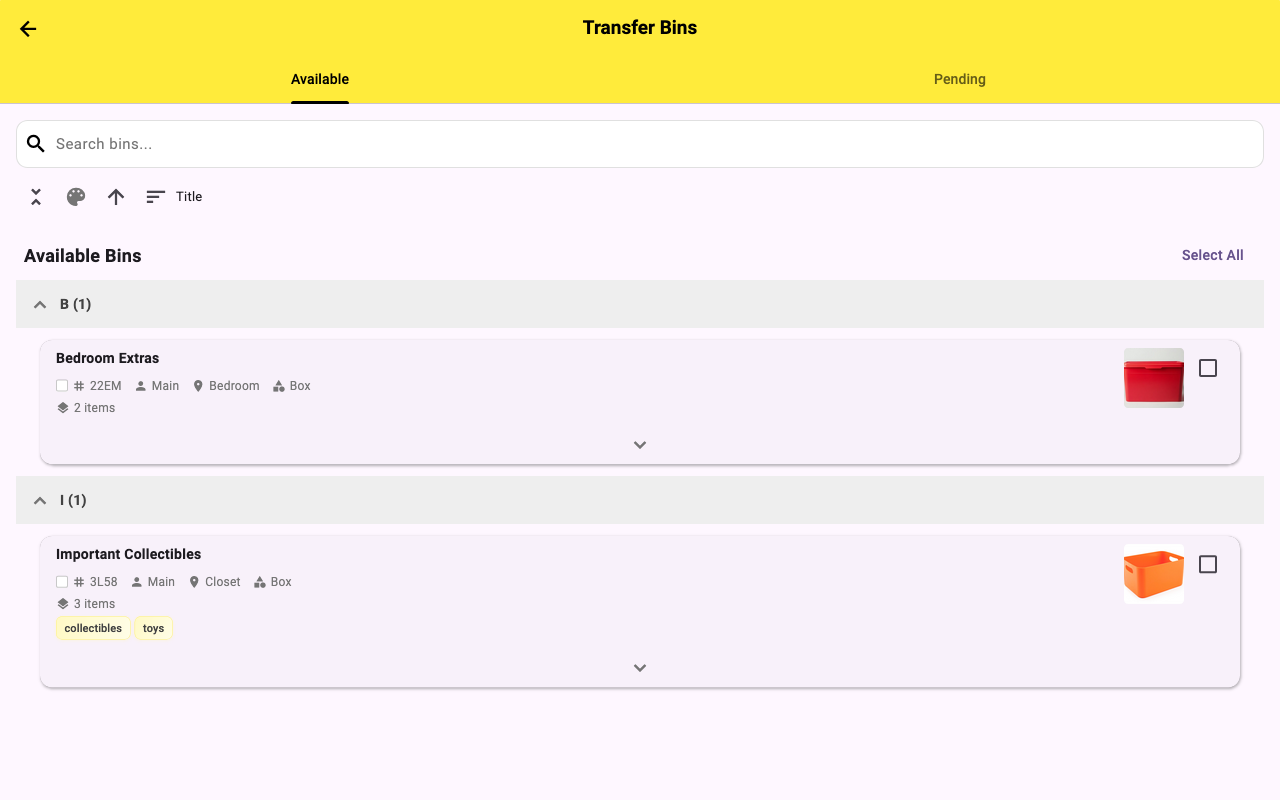
Transferring Bin Ownership
- Go to Settings → Transfer Bins.
- Select the bins you want to transfer.
- Enter the recipient's email. They'll receive ownership of those bins permanently.
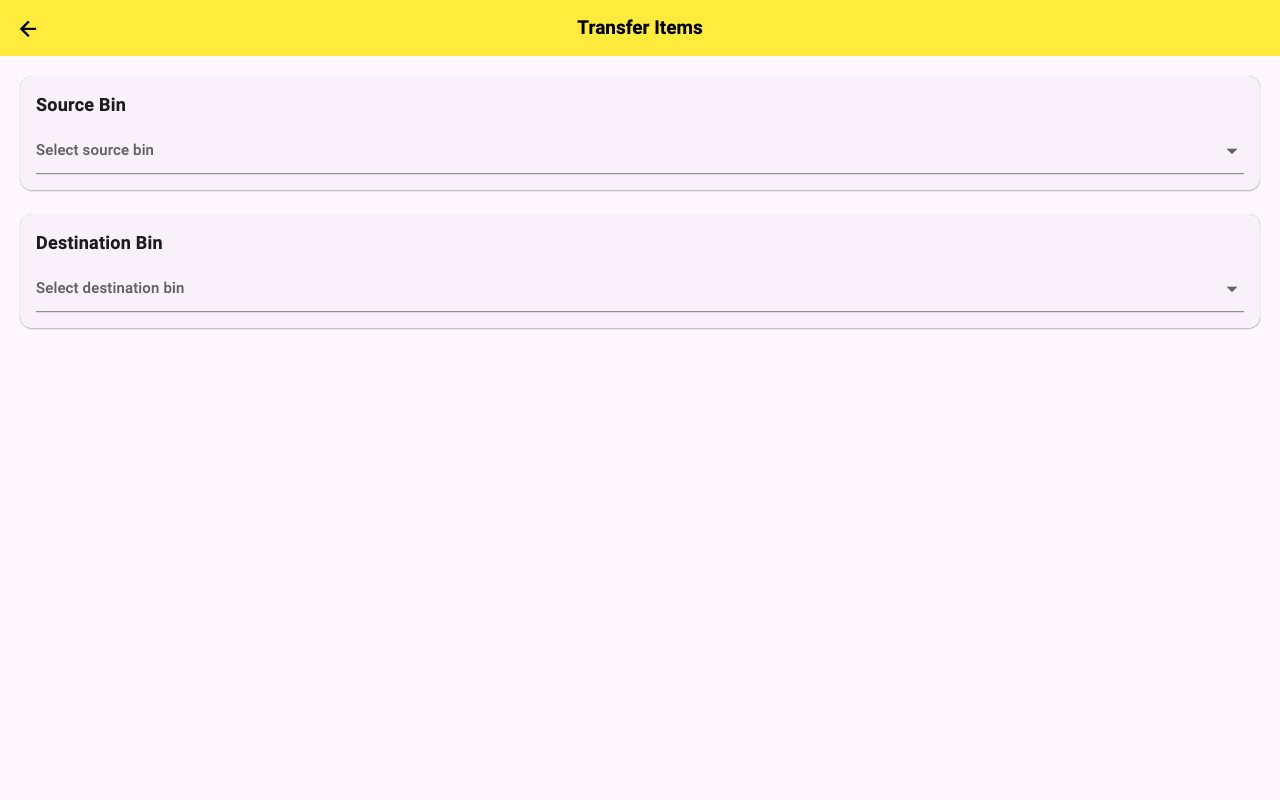
Moving Items Between Bins
- Go to Settings → Move Items.
- Select one or more items using the multi-select mode.
- Choose the destination bin from the list.
- Tap Move. The items are relocated instantly.
8 Generating Inventory Reports
Get a complete printable inventory of everything you own, filtered exactly how you need it.
- Go to Settings → Inventory Report.
- Apply filters: select a Profile, Location, Tag, or leave all blank for a full inventory.
- Choose the report format: PDF, CSV, or Excel (XLSX).
- Tap Generate Report. The report is sent to your account email within a few minutes.
- Open the email and download or print the report.
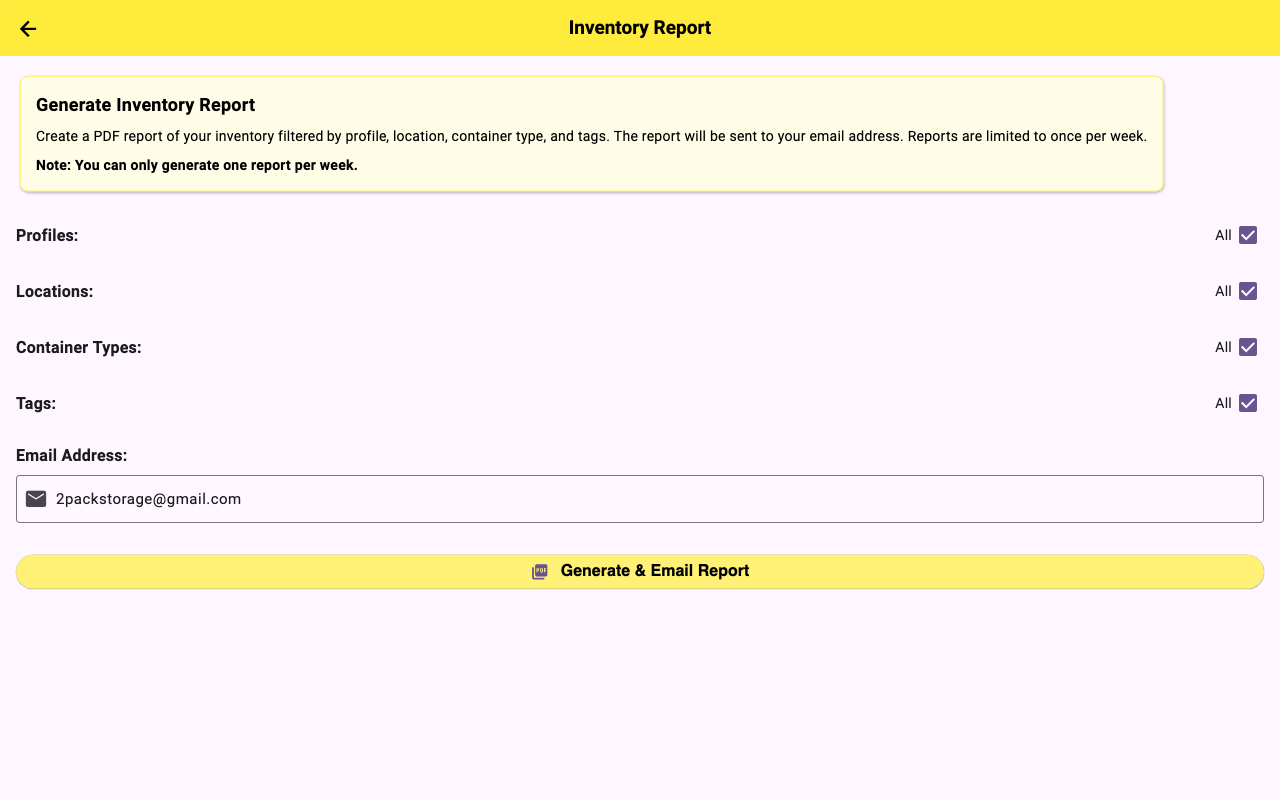
Use cases: Insurance documentation, home valuation, moving checklists, business asset tracking, estate planning, tax records for business equipment.
9 Purchasing QR Labels
Run out of labels? Order more directly through the app. Choose between print-at-home labels and pre-printed labels shipped to your door.
Print Labels (at home)
- Go to Settings → Buy Labels → Print or tap the label purchase icon.
- Choose your label size and quantity. Select a numbering style (sequential, random).
- Complete checkout with Stripe. You'll receive a PDF with QR codes ready to print on standard label paper.
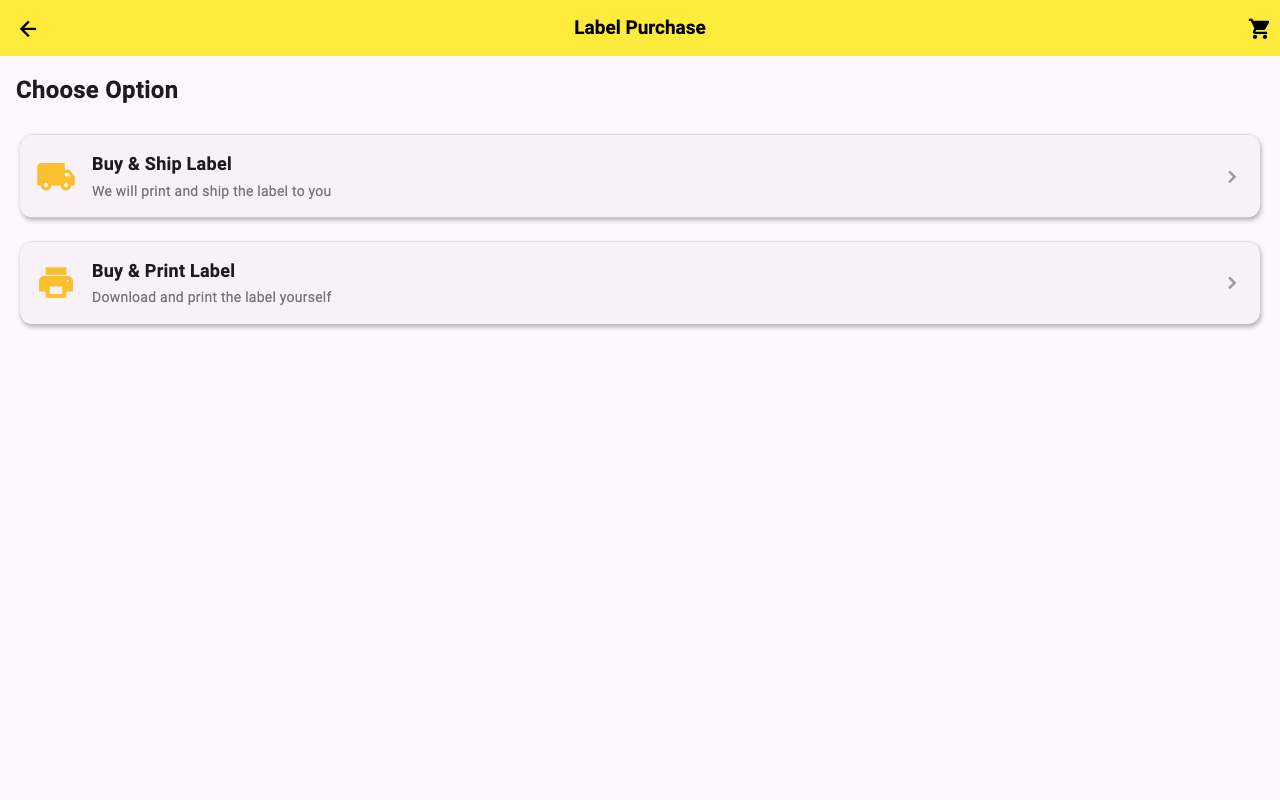
Ship Labels (pre-printed)
- Select Ship Labels on the purchase screen.
- Choose a label type (Standard, Long Lasting, or Water Resistant), size, and quantity.
- Enter your shipping address and complete checkout. Labels arrive pre-printed and ready to stick.


Amazon option: 2PACK labels are also available on Amazon starting at $5.99 per pack — great if you need fast Prime shipping.
10 Account & Settings
Manage your account details, recover deleted content, and find help resources from the Settings menu.
Account Settings
- Go to Settings → Account to update your email address or change your password.
- Enable or disable email notifications for activity on shared bins.

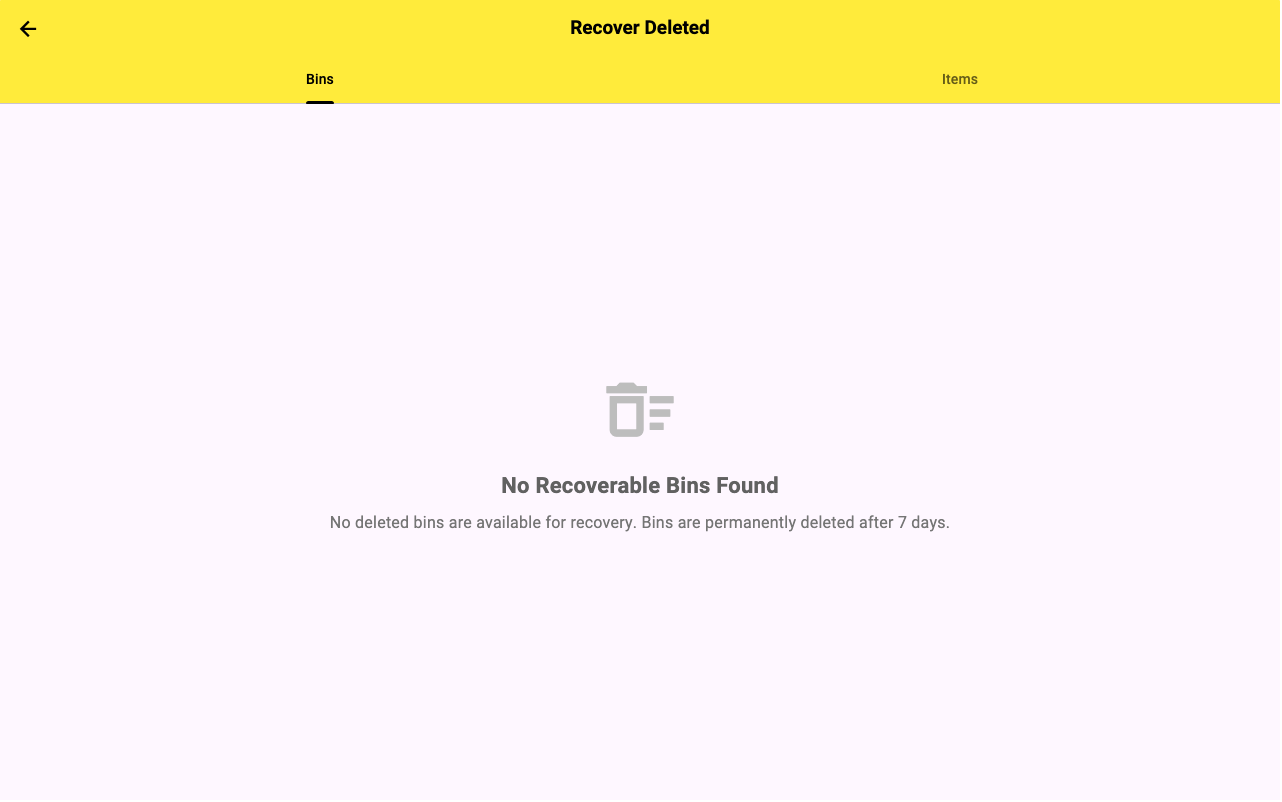
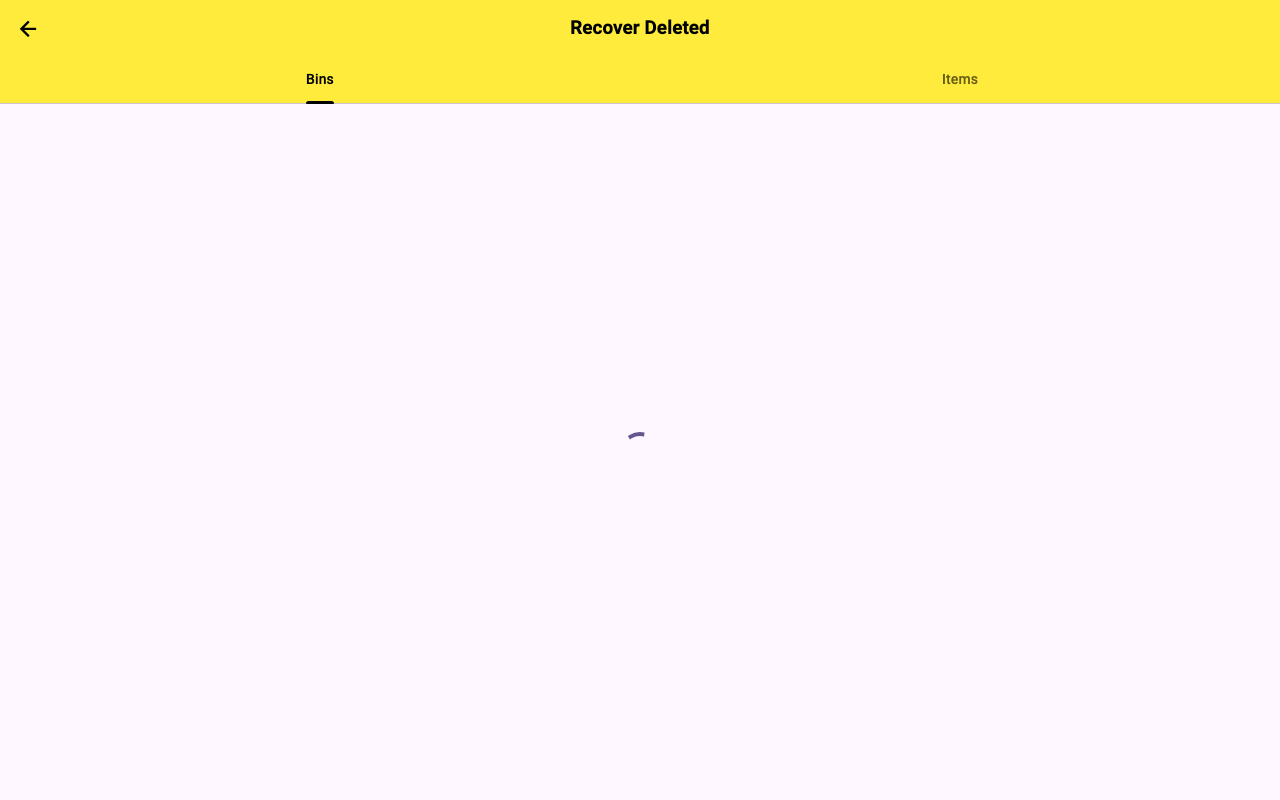
Recovering Deleted Bins & Items
- Go to Settings → Recover Deleted.
- Deleted bins and items are kept for 30 days. Tap any entry to restore it to your account.
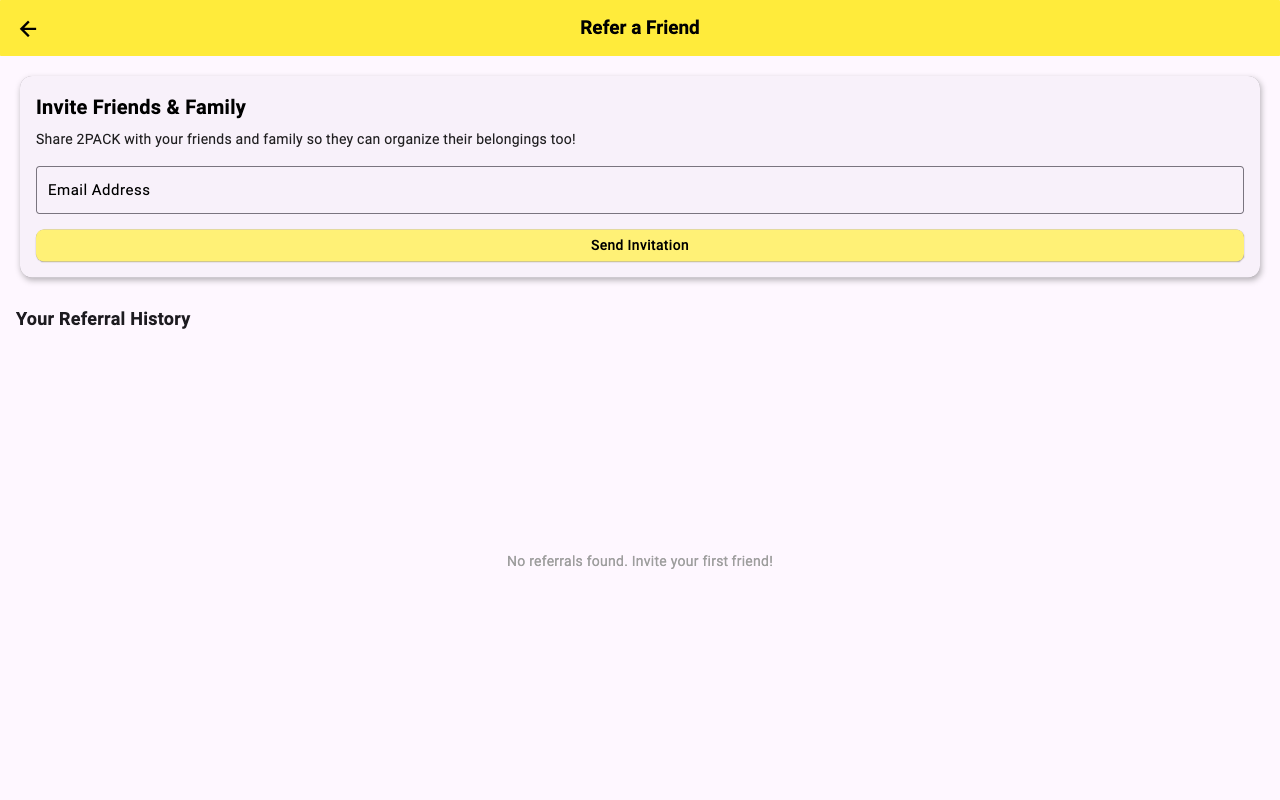
Refer a Friend
- Go to Settings → Refer a Friend.
- Share your unique referral link via any messaging app. When a friend signs up, you both benefit.
Resources & Help
Go to Settings → Resources for links to the FAQ, contact support, social media, and this guide.

Ready to Get Organized?
2PACK is free — the app has no subscription, ever. Labels start at $5.99.
Start for Free → Get Labels on Amazon